Have you ever spent a productive morning crafting the perfect blog post in Microsoft Word, polishing every sentence and image, only to face a nightmare when moving it to your website?
You paste the text into WordPress, and suddenly, chaos ensues. Images disappear, fonts break, spacing is erratic, and you end up spending hours fixing layout issues instead of publishing content.

As a full-stack developer and SEO specialist, thecloudcoupon.com know this frustration intimately. But the problem goes deeper than just “ugly” formatting. Copy-pasting directly from Word creates massive amounts of “dirty code” (HTML bloat) that ruins your site speed and hurts your SEO rankings.
Don’t worry. In this guide, I will show you the professional workflow to import Word files to WordPress that keeps your formatting intact and your code 100% clean.
Why You Should Never Copy-Paste Directly from Word
It is tempting to just hit Ctrl + C in Word and Ctrl + V in WordPress. However, this seemingly harmless action is a technical disaster for your website.
HTML Bloat and SEO Damage
Microsoft Word is an offline processor. To render text, it uses proprietary styling tags (often cluttering your source code with class=”MsoNormal“, mso-style, and useless <span> tags). When you paste this into WordPress, you are injecting thousands of lines of junk code.
- The Consequence: This increases your DOM size, slows down page loading times, and negatively impacts your Core Web Vitals. Google penalizes slow, messy sites.
The “Broken Image” Syndrome
This is the most common pain point. WordPress cannot automatically extract an image from your local clipboard path and upload it to the server just by pasting.
- The Result: You might see the image briefly, but it is often linked to a local temp file on your computer. Once you publish, your readers will see broken image icons.
Block Editor (Gutenberg) Conflicts
While the modern Gutenberg editor is an improvement, converting complex Word formatting (like Tables, Lists, or Footnotes) into WordPress Blocks often results in layout shifts or uneditable blocks.
The Ultimate Solution: Mammoth .docx Converter
Stop fixing errors manually. The industry-standard solution for developers and content managers is a free plugin called Mammoth .docx Converter.
Unlike other importers, Mammoth is built with a developer’s mindset: It focuses on structure, not visuals. It ignores the proprietary Word styling and converts your document into clean, semantic HTML (proper H1, H2, p, ul, ol tags). Why it’s a game-changer:
- Clean HTML: It strips away all the “junk” code.
- Auto-Image Upload: It extracts images from the .docx file and uploads them directly to your WordPress Media Library.
- Compatibility: Works perfectly with both the Classic Editor and Gutenberg.
Step-by-Step: How to Import Word to WordPress Correctly
Here is the 2-minute workflow to turn a docx file into a published post.
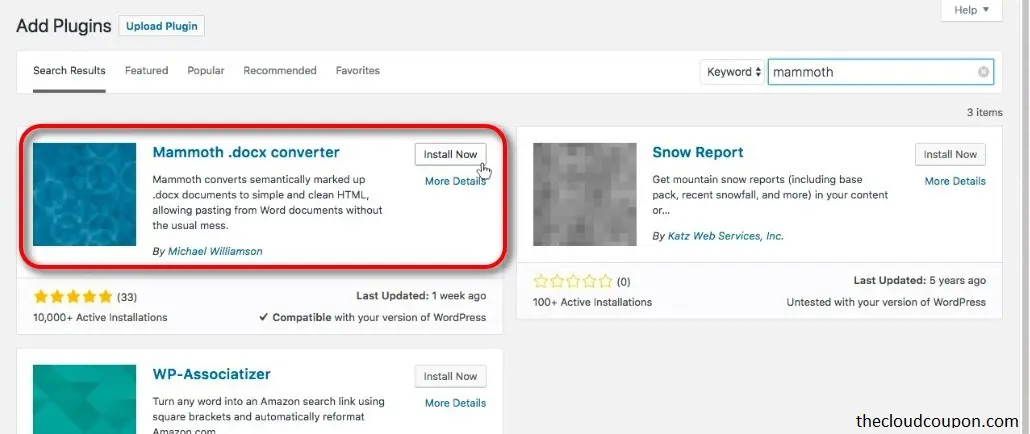
Step 1: Install and Activate the Plugin
- Go to your WordPress Dashboard.
- Navigate to Plugins -> Add New.
- Search for “Mammoth .docx converter“.
- Click Install Now, then Activate.
Alternatively, you can also access this link to download it directly to your computer.
Step 2: Optimize Your Word File
For the best results, format your Word document using styles, not manual overrides:
- Use actual Heading 1, Heading 2, Heading 3 styles in Word (don’t just bold text and increase font size).
- Use Word’s native Bullet Points or Numbered Lists.
- Crop and edit your images inside Word before saving.
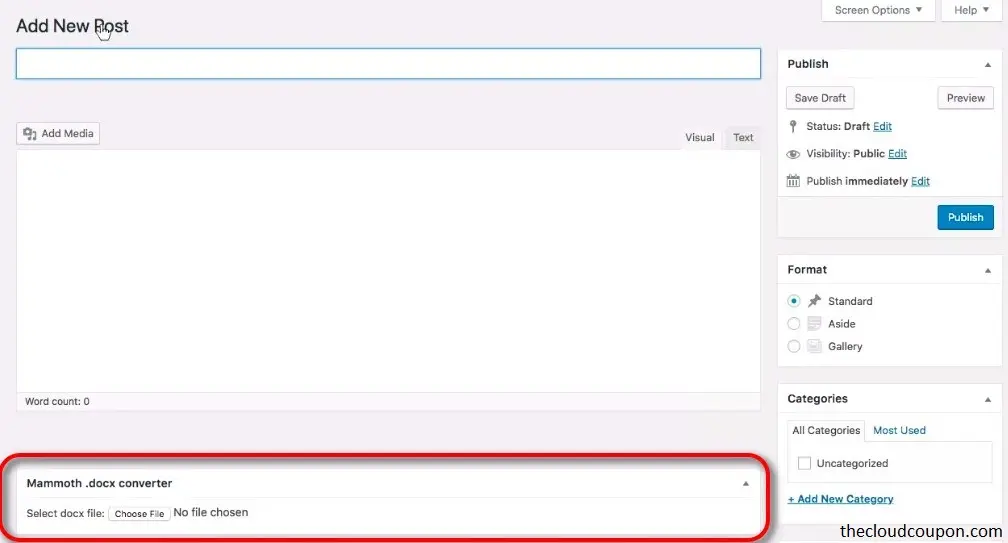
Step 3: Import the File
- Create a new post (Posts -> Add New).
- Scroll down to the bottom of the editor. You will see a new widget labeled Mammoth .docx converter.
- Click Choose File and select your .docx file.
Pro Tip: Do not click “Insert” immediately. Look at the preview first.
Step 4: Preview and Insert
Mammoth offers two preview modes:
- Visual: Shows how it will look to the reader. Check if images are present and paragraphs are separated.
- Raw HTML: (My favorite view). This shows the actual code. You will see clean <p> and <h2> tags without any inline CSS garbage.
If it looks good, click the blue button: Insert into editor.
The plugin will process the text and upload all images to your server automatically.
Expert Tips for SEO & E-E-A-T
Importing the content is just step one. To ensure your article ranks high on Google, follow these post-import optimization steps:
- Add Image Alt Text: Google cannot “see” images. After importing, click on your images in WordPress and add descriptive Alt Text. This is crucial for accessibility and image SEO.
- Check Internal Links: If your Word doc had hyperlinks, verify they work. Set external links to “Open in new tab” to keep users on your site.
- Compress Images: Word files often contain heavy, uncompressed images. I recommend using an optimization plugin like ShortPixel or Smush to automatically compress these images after Mammoth uploads them.
Frequently Asked Questions (FAQ)
Does this work with Page Builders like Elementor or Divi?
- Yes. Mammoth inserts content into the standard WordPress editor. You can import the content first, then open it with Elementor/Divi to style it further.
Can I import Google Docs?
- Yes. simply go to your Google Doc, click File -> Download -> Microsoft Word (.docx). Then, use that file with Mammoth.
Why do my tables look plain?
- Mammoth prioritizes clean code over complex styling. It converts Word tables into basic HTML tables. For advanced styling, you should use CSS or a dedicated Table Block in WordPress after importing.
Conclusion
Importing content from Word to WordPress shouldn’t be a struggle. By using the Mammoth .docx converter, you not only save hours of re-formatting time but also ensure your website’s code remains clean and fast.
In the world of SEO, speed and user experience are everything. Don’t let technical glitches get in the way of your great content.
Have you tried this workflow yet? Or do you have another method for handling large content imports? Let me know in the comments below!