Are you dreaming of building a professional WordPress website but aren’t quite ready to invest in a domain or hosting? Or perhaps you are a developer looking for a safe “sandbox” on your MacBook to experiment with code without the risk of breaking a live site?

Installing WordPress on Mac using a Localhost environment is the ultimate solution. In this guide, thecloudcoupon.com will walk you through using MAMP to transform your Apple computer into a powerful personal web server. As a systems architect, I’ll share “pro-tips” to ensure your setup is smooth, secure, and ready for future scaling.
Why Use MAMP for Local WordPress Development?
Before diving into the “how,” let’s understand the “what.” To run WordPress, you need a stack consisting of an Operating System, a Web Server, a Database, and a programming language.
What is MAMP?
MAMP stands for Macintosh, Apache, MySQL, and PHP. It is an all-in-one software bundle that automates the complex setup of a local server.
- Apache/Nginx: These are the engines that serve your website files. While MAMP often defaults to Apache, Nginx is a popular alternative known for its high-performance capabilities.
- MySQL: The database management system where WordPress stores all your posts, comments, and user data.
- PHP: The scripting language that powers the WordPress core.
MAMP vs. Others: The Apple Advantage
While XAMPP is a titan on Windows, MAMP is widely considered the gold standard for macOS because:
- Native Optimization: Built specifically for the Mac interface and architecture, leading to fewer system conflicts.
- User-Friendly GUI: You can start or stop your servers with a single click-no command line required.
- Flexibility: It allows you to switch between PHP versions easily to test plugin compatibility.
Download and Install MAMP (Avoid the “Pro” Trap)
The first step is straightforward, but many beginners accidentally get stuck with the paid version.
- Visit the Official Site: Go to the MAMP Website and download the version compatible with your Mac (Intel or Apple Silicon M1/M2/M3).
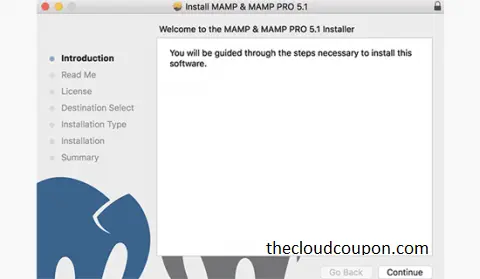
- Run the Installer: Open the .pkg file and follow the prompts.
- Crucial Note: The installer bundles MAMP and MAMP PRO. For most local projects, the free version is more than enough. When you open your Applications folder, look for the grey folder labeled MAMP (not the blue MAMP PRO folder).
Professional Configuration
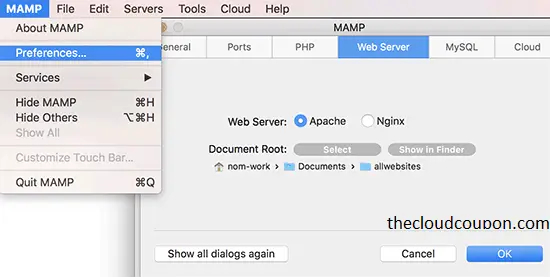
A proper configuration prevents 90% of common errors. Open the MAMP application and click on Preferences.
Port Settings: 8888 or 80?
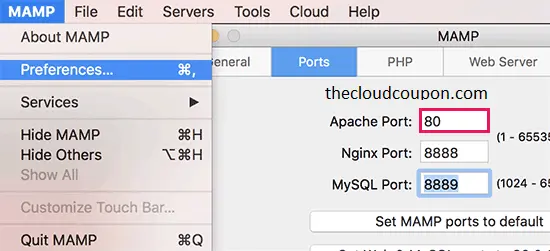 In the Ports tab, you have two main choices:
- The Safe Choice (Default): Leave the Apache Port at 8888. This prevents conflicts with system-level services and doesn’t require an admin password every time you start the server. Your URL will look like http://localhost:8888/.
- The Clean Choice (Port 80): This makes your URL cleaner: http://localhost/. However, macOS often blocks Port 80 for security reasons, which can lead to startup failures.
Selecting the PHP Version
Under the PHP tab, select the most recent version available. Modern WordPress versions perform significantly better and are more secure on PHP 8.x.
Setting the Document Root
In the Web Server tab, the “Document Root” is the folder where your website files live. The default is /Applications/MAMP/htdocs. You can keep this or point it to a custom folder in your “Documents” for easier access.
Create Your Database
WordPress needs a place to store its “soul.” We use phpMyAdmin to create this database.
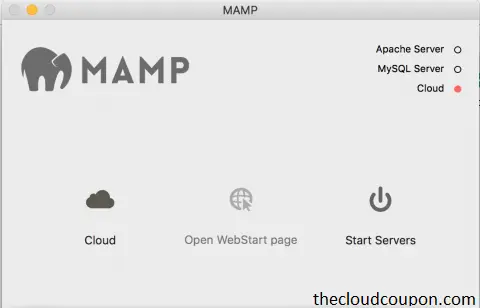
- On the MAMP dashboard, click Open WebStart page.
- Navigate to Tools > phpMyAdmin.

- Click the Databases tab.
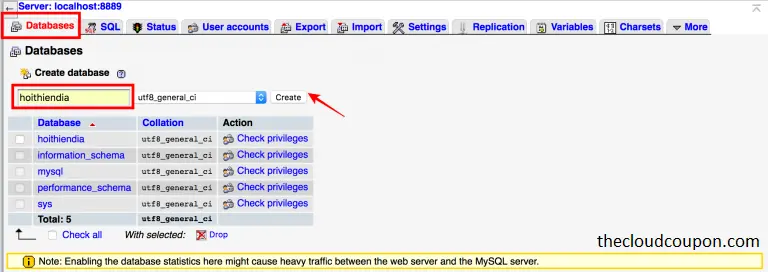
- Under Create database, enter a name (e.g., my_wp_site).
- Set the collation to utf8mb4_unicode_ci for the best multilingual support.
- Click Create.
Installing WordPress (The 5-Minute Setup)
- Download WordPress: Get the latest version from wordpress.org.
- Extract and Move: Unzip the file and move the wordpress folder into your MAMP htdocs directory.
- Rename: Rename the folder to your project name, such as myproject.
- Run the Install: Open your browser and go to http://localhost:8888/myproject.
Database Connection Details When prompted, enter these default MAMP credentials:
- Database Name: (The name you created in Step 3).
- Username: root
- Password: root
- Database Host: localhost
Follow the remaining prompts to set your site title and admin password. Congratulations! Your local WordPress site is live.
Scaling Beyond Localhost: Understanding the Production Environment
Once your site is ready for the world, you will likely move it to a Linux-based VPS. This is where professional tools like Nginx become essential.
- Reverse Proxy Benefits: In a production setting, Nginx is often used as a Reverse Proxy. It acts as an intermediary between the client and your server.
- Security and Anonymity: A Reverse Proxy masks your server’s true IP address, acting as a shield against direct attacks. All requests and responses must pass through this proxy server.
- Performance: It can significantly boost performance through data compression and caching.
- Load Balancing: As your traffic grows, a Reverse Proxy can distribute the load across multiple servers, ensuring your site stays online under heavy traffic.
Troubleshooting Common Issues
- “Error Establishing a Database Connection”: Double-check your wp-config.php. Remember, MAMP uses root for both the username and password, unlike other stacks that leave the password blank.
- Servers Won’t Start (No Green Light): This usually means another app is using your selected Port. Try changing the port to a unique number like 8888 in the MAMP settings.
- 404 Errors on Subpages: This happens if your .htaccess file isn’t working. Ensure “AllowOverride All” is set in your server configuration.
Final Thoughts
Setting up WordPress locally on your Mac is the first step toward web mastery. It provides a risk-free environment to learn, build, and break things. Once you are comfortable, you can explore advanced topics like configuring Nginx Reverse Proxies to scale your site for millions of users.
Did you run into any issues during the setup? Drop a comment below, and let’s troubleshoot together!