
You’ve just purchased a stunning HTML Landing Page template from ThemeForest, or perhaps you’ve hand-coded a “blazing fast” product showcase page. Now, you face a common headache: How do you upload this HTML page to WordPress without breaking the design or triggering those dreaded “404 Not Found” errors?
Many users mistakenly believe they can simply drag and drop files into the Media Library. However, WordPress has a very specific way of handling URLs (Permalinks). If you don’t do this correctly, your custom HTML page will either be overridden by the WordPress theme or fail to load entirely.
Don’t worry. thecloudcoupon.com will walk you through the three safest, most effective methods to integrate a static HTML page into your WordPress site. This guide will help you maintain the lightning-fast speed of static HTML while keeping your main site running on WordPress.
Why Upload a Static HTML Page to WordPress?
Even with powerful page builders like Elementor or Divi, there are compelling reasons why Marketers and Developers still prefer standalone HTML files:
- Lightning Speed: Static HTML pages do not require database queries like WordPress pages do. This allows them to achieve near-perfect scores on Google PageSpeed Insights-crucial for high-converting Paid Ads campaigns.
- Design Freedom: Sometimes, you need a unique layout or complex animations that your current WordPress theme simply cannot support without heavy customization.
- Portfolios & Demos: Junior developers often need to host coding projects or demos within their personal portfolio sites.
The challenge, however, is making these two platforms coexist seamlessly under one domain. Let’s dive into the technical details.
Preparation: “Clean” Your Files Before Uploading
Before accessing your hosting, you must ensure your HTML files are ready. Skipping this step is the #1 cause of broken layouts (missing CSS/Images).
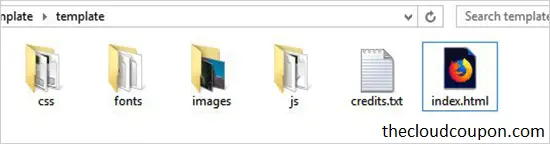
- Rename the main file to index.html: Web Servers (like Apache or Nginx) are configured to look for an index file to load first. If your file is named home.html or intro.html, rename it to index.html.
- Pro Tip: Some older guides suggest renaming it to index.php. This is only necessary if you want to use WordPress PHP logic inside the file. For pure performance, keep the .html extension.
- Check Your Paths: Open your code and ensure all links to CSS, JS, and Images use relative paths (e.g., css/style.css) or correct absolute paths. Avoid local paths like C:/user/desktop/project….
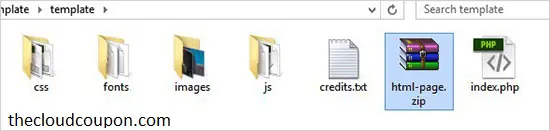
- Zip It Up: Select all your files (the HTML file and the CSS/JS/Images folders) and compress them into a single .zip file.
Method 1: Using cPanel / File Manager (Recommended)
This is the most professional method. It keeps your file structure clean and avoids installing unnecessary plugins that slow down your site.
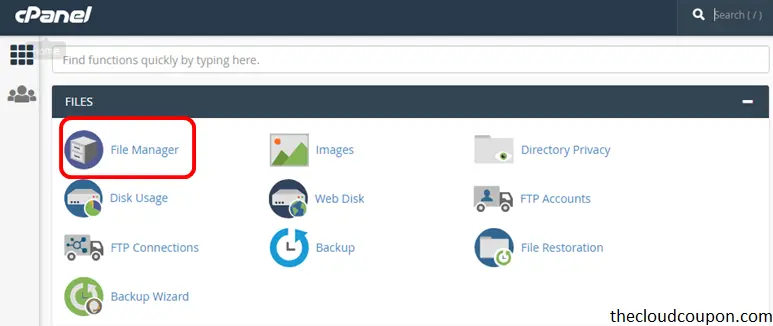
Step 1: Access File Manager
Log in to your Hosting Control Panel (cPanel, DirectAdmin, or Plesk). Locate and click on File Manager.
Step 2: Locate the Root Directory
Navigate to the root folder that contains your WordPress installation. In 99% of cases, this folder is named public_html.
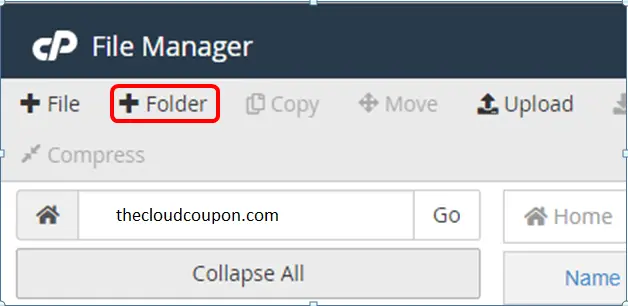
Step 3: Create a New Folder
Do not upload your files loosely into the root folder alongside the WordPress core files.
- Create a New Folder inside public_html.
- The name of this folder will become your URL slug.
- Example: If you name the folder black-friday, your URL will be yourdomain.com/black-friday.
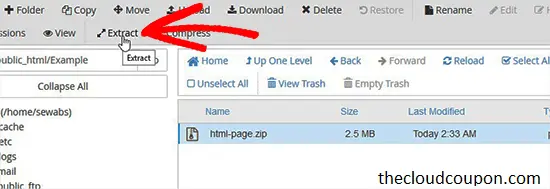
Step 4: Upload and Extract
- Open the folder you just created.
- Click Upload and select your prepared .zip file.
- Once uploaded, right-click the zip file and select Extract.
- This is the result after extracting the Zip file.
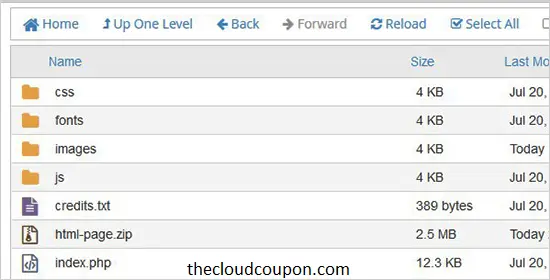
- Delete the .zip file to save server space.
Now, try visiting yourdomain.com/your-folder-name. If it loads perfectly, congratulations! If you see a 404 error, skip to the Troubleshooting section below.
Method 2: Using a WordPress Plugin (Beginner Friendly)
If you are not comfortable navigating cPanel, you can perform these actions directly from your WordPress Dashboard using a plugin.
- Recommended Plugin: File Manager or WP File Manager.
- Install: Go to Dashboard > Plugins > Add New > Search for “File Manager” > Install & Activate.
- Access: A folder icon will appear in your left sidebar. Click it to open an interface that looks exactly like cPanel.
- Action:
- Right-click on public_html > New Folder.
- Name your folder (e.g., landing).
- Enter the folder, drag and drop your .zip file, and select “Extract files here.”
Security Warning: Once you have successfully uploaded your page, I strongly recommend Deactivating and Deleting this plugin. Keeping file management plugins active can create security vulnerabilities if left unattended.
Method 3: Using FTP (For Large Files)
If your HTML page contains heavy video backgrounds or high-res assets (over 50MB), browser uploads might time out. FTP (File Transfer Protocol) is the stable solution.
- Download an FTP client like FileZilla.
- Connect to your host using your FTP credentials (IP, Username, Password-usually provided in your welcome email from the host).
- Right side (Server): Navigate to public_html, right-click to Create directory, and name it.
- Left side (Local Computer): Drag and drop your unzipped HTML files directly into the new folder on the right.
The Expert Zone: Fixing 404 Errors & SEO
This section separates the amateurs from the pros. A common issue after uploading is the WordPress 404 Page Not Found error.
Why does the 404 error happen?
WordPress uses a file called .htaccess to intercept all URL requests and route them through index.php (the WordPress brain). Sometimes, it is too aggressive and blocks access to your custom sub-directories.
How to Fix It:
If naming your file index.html inside a subfolder didn’t work, try these steps:
Edit the .htaccess file (The Correct Way)
You can create a new .htaccess file specifically inside your new HTML folder (e.g., public_html/landing-page/.htaccess) with the following code. This tells the server to prioritize your HTML file in this specific location:
<IfModule mod_rewrite.c>
RewriteEngine On
RewriteBase /
RewriteRule ^index\.php$ - [L]
RewriteCond %{REQUEST_FILENAME} !-f
RewriteCond %{REQUEST_FILENAME} !-d
RewriteRule . /index.html [L]
</IfModule>
The “Rename to PHP” Trick
As mentioned in older guides, you can rename index.html to index.php.
- Pros: WordPress servers always recognize .php files.
- Cons: You might need to adjust syntax if your HTML code conflicts with PHP tags.
- Verdict: Use this only as a last resort if the .htaccess method fails.
SEO for Static HTML Pages
Remember, this page sits outside the control of plugins like Yoast SEO or RankMath. You must manually add SEO tags into the <head> section of your HTML code:
<title>Your Catchy Title Containing Keywords</title>
<meta name="description" content="A compelling description that encourages clicks and includes your main keyword.">
<link rel="canonical" href="https://yourdomain.com/your-folder/" />
Conclusion
Uploading an HTML page to WordPress isn’t complicated once you understand the folder structure. Creating a sub-directory and uploading via cPanel/File Manager is the best balance of professionalism and ease. It allows you to leverage high-speed Landing Pages while keeping your main WordPress ecosystem intact.
What type of page are you planning to upload? A sales page, a lead magnet, or a portfolio? If you encounter the legendary “404 error” or have path issues, drop a comment below. I’ll help you debug it!
Good luck, and may your page load speeds be ever in your favor!